
Table of Contents
Checking server uptime on Windows Server helps administrators monitor system stability, detect unexpected reboots, and track how long the server has been running without interruption.
Many administrators regularly monitor uptime on Windows VPS servers to identify crashes, maintenance events, or performance issues affecting hosted applications and remote services.
Step 1: Check Server Uptime Using Task Manager
Press CTRL + SHIFT + ESC to open Task Manager. In the Performance tab, select CPU and locate the Up time field:
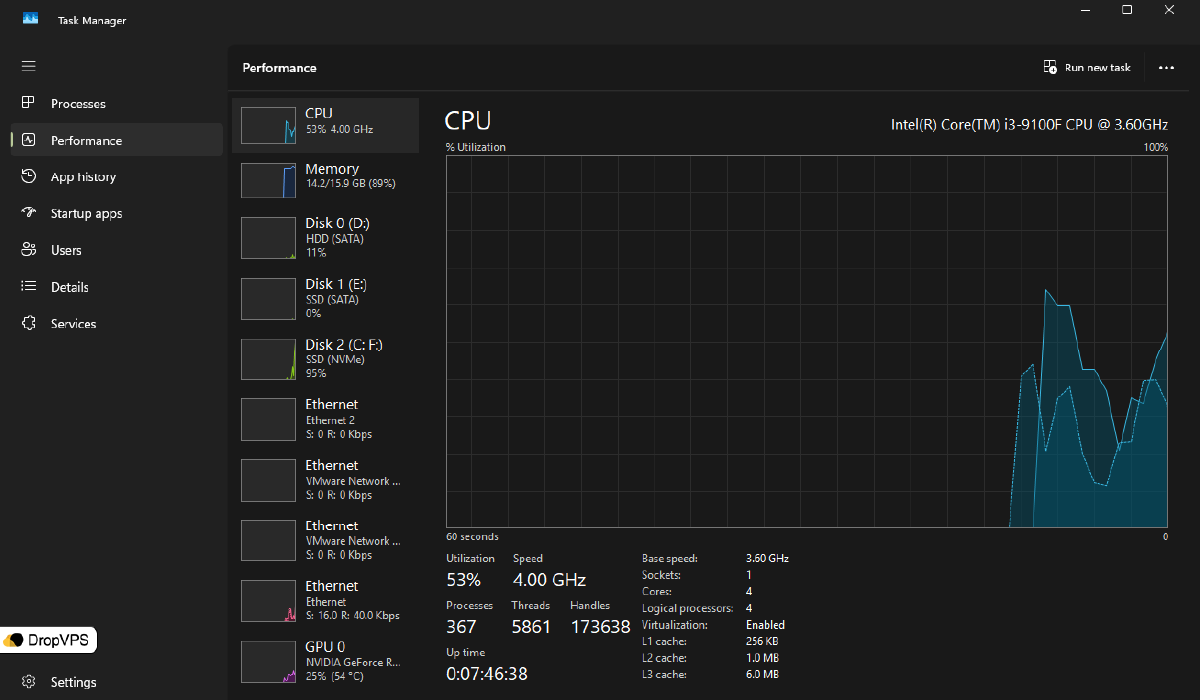
Find the Up time field, which shows how long the server has been running since the last reboot.
Step 2: Check Uptime Using Command Prompt
Open Command Prompt as Administrator.
Run the following command:
systeminfo | find "System Boot Time"Example output:
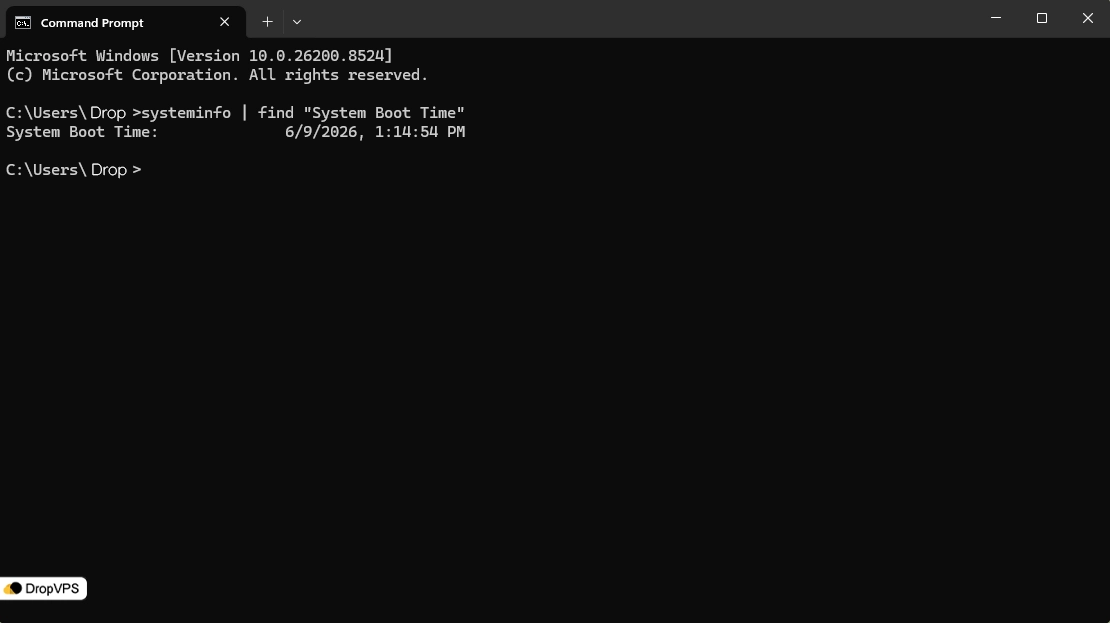
This displays the exact time the server last started.
Step 3: Check Uptime Using PowerShell
Open PowerShell as Administrator.
Run:
(get-date) - (gcim Win32_OperatingSystem).LastBootUpTimeExample output:
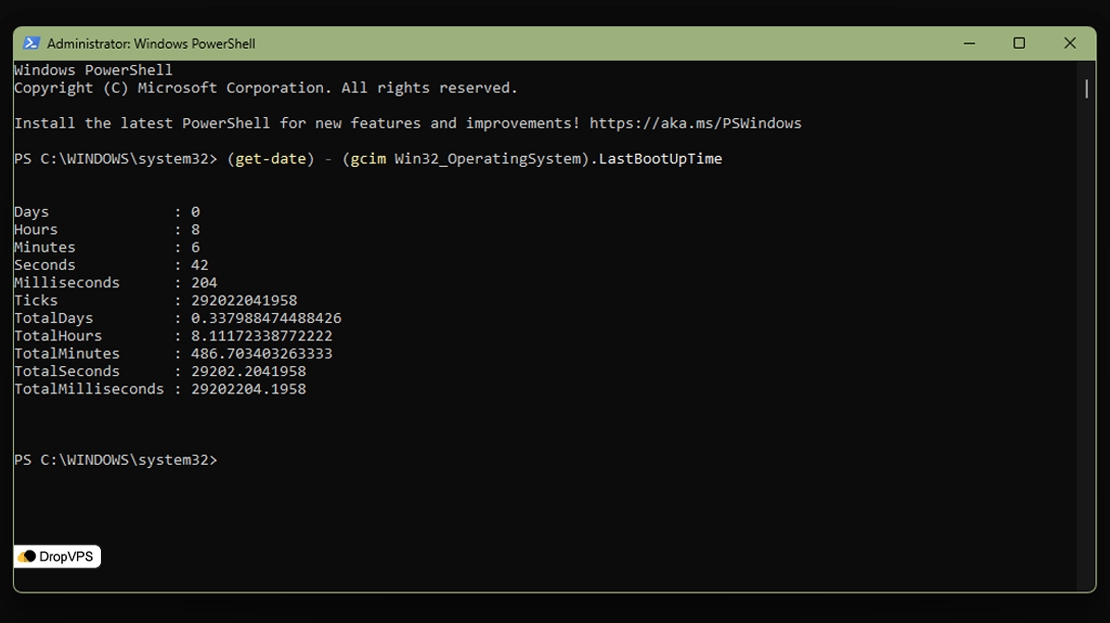
This command shows the current uptime duration in days, hours, and minutes.
Step 4: Check Last Reboot Event
Open Event Viewer:
eventvwr.mscNavigate to:
Windows Logs → SystemLook for event IDs related to system startup and shutdown activity.
Step 5: Check Uptime with WMIC
Open Command Prompt and run:
wmic os get lastbootuptimeExample output:
20260515104231.500000+000This value represents the exact last boot timestamp.
Checking uptime on Windows Server provides useful insight into system stability and helps administrators maintain reliable VPS environments and hosted services.

Need a Windows Server?
DropVPS Windows VPS gives you full Admin RDP access, instant setup, and dedicated resources — run any Windows workload without limits.
- Full Admin Access
- RDP Ready Instantly
- Dedicated Resources
- 24/7 Support
No commitment · Cancel anytime